
Progress has continued on the camper, albeit at a slowish pace.
Since the last post I have refreshed the MOT. The was initially a failure on the fog light switch being loose (I was due to pick up a replace dash the following day so took a chance) and the number plate lights.
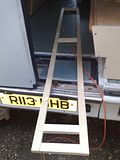
These lights are located on the fold out step and wired via brass/copper contacts that only make a connect when the step is folded away. As the step is quite worn the contact is hit and miss. The was on a Saturday so the tester gave me 2 hours to go away and rectify the two problems. The fog switch problem I resolved my knocking up a plywood insert for the dash in place of the broken plastic, whereas I ripped out the contacts and ran folding loom in for the steps. I know this isn't ideal but I intend to replace these steps with a proper motorhome type fold out set which should be much lighter (not being engineered for stretchers, etc).
I also managed to fit all the cupboard doors, the cooker and fridge (they've been in before, but are now in their final fix). The only remaining item on the cupboards are the shelves (simple 3mm ply planned) and the drawer which I need to make and fit.
I also sourced an ex caravan bedframe to make the junior over seat bed in the cab and pieces of another double front seat to allow me to add a second seatbelt to the twin rear seats.
My current focus is on items which prevent use of the vehicle as opposed to the nice to haves. This isn't stopping the collection of usefull bits though.
The vehicle has also seen some use on the road with trips varying from 400 miles one day to around 80 a few times for localish trips.
I had a problem on one of the trips when the valve on one of the wheels failed, luckily on a small road with a handy layby ahead. Only problem I still hadn't sourced a spare (it came with none). If anyone knows where I can get a 15 inch twin wheel Sprinter wheel cheap (don't care about the tyre), please shout.
That's all for today....
Showing posts with label Cupboards. Show all posts
Showing posts with label Cupboards. Show all posts
Monday, 13 September 2010

Sunday, 20 June 2010
Camper Part 29: Delightful Doors
You may recall that while I provided a detailed blog on the creation of the kitchen unit carcasses, I kind of skipped over the details relating to the worktops and getting the cooker and fridge in place as I was preparing for the MOT.
At that point, while I had created the carcasses, fitted sides, counter tops and the cooker and fridge. I had not yet actually panelled the front or fitted doors, drawers, etc.
The plan was to fit a complete sheet of 3mm plywood over the front of the carcass and then cut out the holes. This means that there will be few or no join lines on the front surface of the units. It also means that I could use the pieces cut out of the holes as the infill panels on the doors.
Earlier this year (just as the snow stopped) I started on the camper again and this was the job I tackled. Once I had the holes cut out (I can't get pictures right now as the camper is acting as storage for it's constituent bits), I was able to measure up the door sizes.
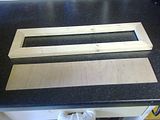
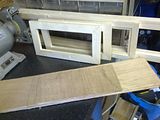
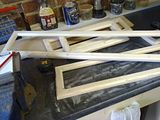
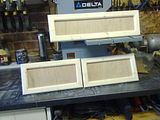
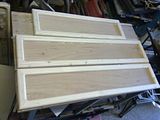
The doors are made of 32mm x 16mm pine batten (similar to what was used for the carcasses). The battens are formed into a rectangle with the left over plywood as an infill panel (kind of like a picture frame). This allows the door to overlap the carcass by around 10mm all round.
I decided I didn't want to get to fancy on the detailing as this is a budget camper, so the approach I took was as follows:
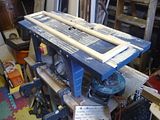
- Using my home table saw (I made a table to fit by handheld circular saw to), I cut a 3mm rebate into the batten for recessing the 3mm ply into later.
- I cut all the pieces to length with a 45 degree angle on each end for joining up. I tried to do this with a hand saw and normal mitre box, but its difficult to be accurate so I bought a cheap motorised mitre box (i.e. basic chop saw) on Ebay. It's amazing how much easier things are with the right tools.
- I had bought a band clamp from B&Q, so over the period of a week I clamped up all 6 frames (each had to stay in the clamp for at least 12 hours).
- The next step was to cut the plywood accurately to size. I did this by finding the center and measuring out from there so that the visible grain will match the carcasses. I did the cutting on my new (to me) band saw (Ebay again, it came with 3 spare blades and half the new price). Again proving the benefits of the right tools as there was no splitting of the ply as when cut by hand.
- The frames where then sanded to level out any gluing imperfections and then using a round over router bit in my new (to me) (Ebay) router table I rounded over the inside and outside edges.
- The final step was to glue and pin the ply insets into the frames. When they are dry Lorraine will help by doing the varnishing (she's the painter in the family). The carcasses will be done at the same time as they have already been sanded and are waiting for this point in time.
If the above is unclear then hopefully the following pictures will help make it clear.


Hinges and handles will only go on when they are fitted. The 3 smaller ones fit horizontally while the other 3 are vertical (i.e. the grain is always vertical). The narrower of the two smaller ones go under the sink. One will be a drawer front (under the draining board), while the other will be a false front, but I will make it open to give access to a shallow space above the fridge which will allow for storage of paperwork, etc.
Tuesday, 4 August 2009
Camper Part 19: MOT Ready or not here I come...
There hasn't been an update for a few days as I have been putting all my energy into getting ready for the MOT (annual road fitness test).
As the vehicle is undergoing a conversion to a 'Motor Caravan' it qualifies for an MOT Test instead of a Goods Vehicle Test. This however means that it must have the basics of a Motor Caravan, like beds and kitchen.
On the weekend I fitted the new dash plastics that I had bought on eBay which resulted in the moving of some of the switches fitted during the ambulance conversion.
This was followed by continuing with the kitchen units. As you know (if you've been following) I completed the carcasses before, so this weekend I cladded the sides in plywood. I also fitted the sink and cooker hob to their respective counter tops and fitted the sink one in place.
At the same time I did the remaining two walls of the bathroom and the bathroom roof. This also involved cutting the holes for the lights in the bathroom and feeding through the wiring. Next steps for the bathroom will be the waterproofing, cladding and then fitting up.
After work I ventured out again and fitted the cooker counter top in place. This was followed by installing the grill box & door as well as the cooker oven. The gas lines for these are connected at the back, but still need plumbing through the floor for connection to the flexi-hose with bottle connector. The long term goal is to fit an under vehicle gas tank.
I also installed the fridge under the sink, but before this drilled the holes for the water supply and waste pipes in the floor and fed the pipes through. I still need to fit the external connections and pump, but didn't relish working on my back on cold concrete at 9:30pm so left that for another day.
As the finishing touch of the day, the passenger seat went back in (it had been removed in order to work on the auxilliary battery) and the cushions for the beds were fitted.
All through this time my wife was helping by clearing out all the accumulated tools and fittings that had migrated into the lockers in the vehicle during the build.
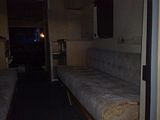
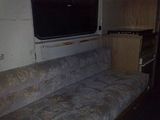
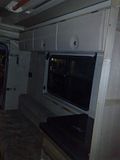
The pictures today aren't great as they were taken in the dark with a mobile phone, but you can get a sense of more completeness...
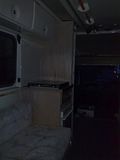
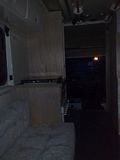
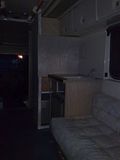
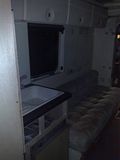
As the vehicle is undergoing a conversion to a 'Motor Caravan' it qualifies for an MOT Test instead of a Goods Vehicle Test. This however means that it must have the basics of a Motor Caravan, like beds and kitchen.
On the weekend I fitted the new dash plastics that I had bought on eBay which resulted in the moving of some of the switches fitted during the ambulance conversion.
This was followed by continuing with the kitchen units. As you know (if you've been following) I completed the carcasses before, so this weekend I cladded the sides in plywood. I also fitted the sink and cooker hob to their respective counter tops and fitted the sink one in place.
At the same time I did the remaining two walls of the bathroom and the bathroom roof. This also involved cutting the holes for the lights in the bathroom and feeding through the wiring. Next steps for the bathroom will be the waterproofing, cladding and then fitting up.
After work I ventured out again and fitted the cooker counter top in place. This was followed by installing the grill box & door as well as the cooker oven. The gas lines for these are connected at the back, but still need plumbing through the floor for connection to the flexi-hose with bottle connector. The long term goal is to fit an under vehicle gas tank.
I also installed the fridge under the sink, but before this drilled the holes for the water supply and waste pipes in the floor and fed the pipes through. I still need to fit the external connections and pump, but didn't relish working on my back on cold concrete at 9:30pm so left that for another day.
As the finishing touch of the day, the passenger seat went back in (it had been removed in order to work on the auxilliary battery) and the cushions for the beds were fitted.
All through this time my wife was helping by clearing out all the accumulated tools and fittings that had migrated into the lockers in the vehicle during the build.
The pictures today aren't great as they were taken in the dark with a mobile phone, but you can get a sense of more completeness...


Monday, 27 July 2009
Camper Part 18: Kitchen Carcasses Complete
As promised in yesterday's installment I got on with the final kitchen unit carcass today.
Having done the major cutting last night, tonight I trimmed the angles on the rear legs for where they meet the roof and assembled the whole lot. I also fitted it, including fixing to the floor, the wall and the cooker unit which it stands next to.
I had to move ond of the light fittings a bit as it will be partially obscured by the cupboard. It still is a bit due to a structural roof bracket preventing me from moving it further. This should be a problem however as the tube can still be changed easily.
Having now completed all the kitchen carcasses, next steps for the kitchen will be the counter tops. I will however be moving back to the bathroom in order to complete the side walls so all structures are in place.
After that, plumbing and electrics with paneling of the various carcasses being the last thing done in order to not have to remove them again (and not dirty them).
I also need to get on with checking the vehicle over for the MOT and booking that for next week.
Today's pictures:
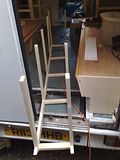
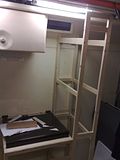
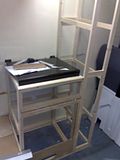
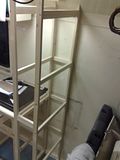
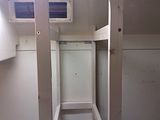
Having done the major cutting last night, tonight I trimmed the angles on the rear legs for where they meet the roof and assembled the whole lot. I also fitted it, including fixing to the floor, the wall and the cooker unit which it stands next to.
I had to move ond of the light fittings a bit as it will be partially obscured by the cupboard. It still is a bit due to a structural roof bracket preventing me from moving it further. This should be a problem however as the tube can still be changed easily.
Having now completed all the kitchen carcasses, next steps for the kitchen will be the counter tops. I will however be moving back to the bathroom in order to complete the side walls so all structures are in place.
After that, plumbing and electrics with paneling of the various carcasses being the last thing done in order to not have to remove them again (and not dirty them).
I also need to get on with checking the vehicle over for the MOT and booking that for next week.
Today's pictures:


Saturday, 25 July 2009
Camper Part 16: Bedtime Bonanza
Last after work I started on the new side panels for the beds. In the caravan the bed boxes were fixed directly to the other cupboards so I needed to create new end panels.
This morning I continued with this, the fiddly bit was that due to the folding step I needed to modify the end and front panels to allow the step to get past. I also had to shorten the beds in order to fix.
The boxes have been completed, but will not be fixed into place until completion of the remaining units. As can be seen from the pictures, I reused most of the original units.
The contraption that you can see in the passenger side unit is the Eberspacher heater. I will possibly relocate this, but at the least move it so that it uses less space.
Tomorrow I hope to tackle the carcass for the second kitchen unit. This will house the cooker and also have a cupboard which runs up to the ceiling for kitchen storage.
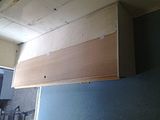
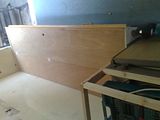
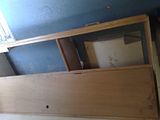
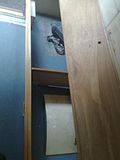
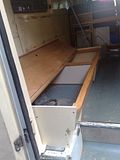
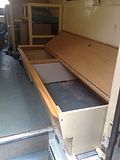
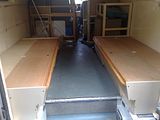
This morning I continued with this, the fiddly bit was that due to the folding step I needed to modify the end and front panels to allow the step to get past. I also had to shorten the beds in order to fix.
The boxes have been completed, but will not be fixed into place until completion of the remaining units. As can be seen from the pictures, I reused most of the original units.
The contraption that you can see in the passenger side unit is the Eberspacher heater. I will possibly relocate this, but at the least move it so that it uses less space.
Tomorrow I hope to tackle the carcass for the second kitchen unit. This will house the cooker and also have a cupboard which runs up to the ceiling for kitchen storage.


Tuesday, 21 July 2009
Camper Part 15: Kitchen Kapers Kommence
As per the last installment, then next steps are the caracssing for the kitchen units.
This will allow for then fitting the bed units which in turn will allow for the modifcation of the mattresses to suit the shortened length.
My approach is to make carcasses which will then be skinned in ply. This approach allows me the get the final size of the units while still retaining decent access for plumbing and electrical work.
On Sunday evening after recovering from the headache which had plagued me for the whole day, I measured up the 'wet unit' which will comprise the sink, fridge, a small cupboard and drawer.
As I had retained the old fridge cupboard out of the caravan, I was able to table accurate measurements of the space required. In the caravan the fridge had a cupboard below it as it was placed over the wheel well, so couldn't sit lower. In this vehicle I will be locating it closer to the floor as the sink will be above it and the sink bowl means that the fridge can't be as high. Also having the old sink counter meant that I could easily measure that up as well.
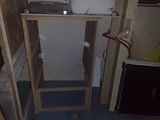
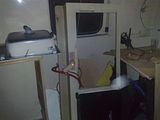
Sketching this out to scale allowed me to figure which wood to use. I had previously purchased a pack each of 44x18 and 33x18 planed pine in 2.7m lengths for this job (I managed to make all the bathroom walls from the wood reclaimed from my neighbours' old kitchen).
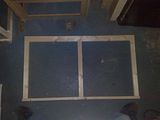
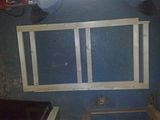
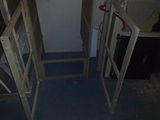
On Monday evening I commenced with the side frames which were finished in short order as they are square and standard shaped, with no wierd walls to comform to.
Tuesday night was taken off as Lorraine was out of town and I prefer to not work outside with Kyle alone in the house.
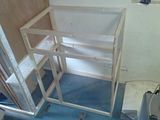
On Wednesday I was able to complete the carcass started on Monday. The photo shows it in place in the vehicle although not fixed in at this stage. The large area on the right is for the fridge, the narrow vertical area on the left is the cupboard mentioned. The upper horizontal area will be divided in two with a drawer on the left, while the right hand side will have a cosmetic 'blanking' cover as the sink bowl will be behind this space.
Next steps are:
The above will then let me continue with the beds and then the cooker unit which will stand opposite the sink unit.
This will allow for then fitting the bed units which in turn will allow for the modifcation of the mattresses to suit the shortened length.
My approach is to make carcasses which will then be skinned in ply. This approach allows me the get the final size of the units while still retaining decent access for plumbing and electrical work.
On Sunday evening after recovering from the headache which had plagued me for the whole day, I measured up the 'wet unit' which will comprise the sink, fridge, a small cupboard and drawer.
As I had retained the old fridge cupboard out of the caravan, I was able to table accurate measurements of the space required. In the caravan the fridge had a cupboard below it as it was placed over the wheel well, so couldn't sit lower. In this vehicle I will be locating it closer to the floor as the sink will be above it and the sink bowl means that the fridge can't be as high. Also having the old sink counter meant that I could easily measure that up as well.


Sketching this out to scale allowed me to figure which wood to use. I had previously purchased a pack each of 44x18 and 33x18 planed pine in 2.7m lengths for this job (I managed to make all the bathroom walls from the wood reclaimed from my neighbours' old kitchen).
On Monday evening I commenced with the side frames which were finished in short order as they are square and standard shaped, with no wierd walls to comform to.


Tuesday night was taken off as Lorraine was out of town and I prefer to not work outside with Kyle alone in the house.
On Wednesday I was able to complete the carcass started on Monday. The photo shows it in place in the vehicle although not fixed in at this stage. The large area on the right is for the fridge, the narrow vertical area on the left is the cupboard mentioned. The upper horizontal area will be divided in two with a drawer on the left, while the right hand side will have a cosmetic 'blanking' cover as the sink bowl will be behind this space.

Next steps are:
- Add the vertical divider for the drawer
- Add a framework for the fridge to rest on and be fixed in place with
- Complete some of the bathroom piping and outside of the bathroom wall
- Fix this unit in place
- Fill the three holes in the floor caused by the removal of the stretcher fixings
The above will then let me continue with the beds and then the cooker unit which will stand opposite the sink unit.
Subscribe to:
Posts (Atom)


