Yesterday was a 'camper' day as I decided to start trying to improve the cosmetics a little.
As is evident in this picture from last year when I was removing the stickers, some paint had lifted off the passenger door. (look carefully in the crease line). As I recall it wasn't on the latest stickers, but some time earlier in the life of the vehicle.
This made the vehicle look tatty, so having located a better door, I went and collected and fitted it yesterday (picture when I manage to download it off the phone). This had the advantage of not waiting for paint to dry and the new door comes off a much newer vehicle so hopefully less time before rust sets.
Showing posts with label Sprinter. Show all posts
Sunday, 26 September 2010
Monday, 13 September 2010
Camper Part 33: Quick update
Progress has continued on the camper, albeit at a slowish pace.
Since the last post I have refreshed the MOT. The was initially a failure on the fog light switch being loose (I was due to pick up a replace dash the following day so took a chance) and the number plate lights.
These lights are located on the fold out step and wired via brass/copper contacts that only make a connect when the step is folded away. As the step is quite worn the contact is hit and miss. The was on a Saturday so the tester gave me 2 hours to go away and rectify the two problems. The fog switch problem I resolved my knocking up a plywood insert for the dash in place of the broken plastic, whereas I ripped out the contacts and ran folding loom in for the steps. I know this isn't ideal but I intend to replace these steps with a proper motorhome type fold out set which should be much lighter (not being engineered for stretchers, etc).
I also managed to fit all the cupboard doors, the cooker and fridge (they've been in before, but are now in their final fix). The only remaining item on the cupboards are the shelves (simple 3mm ply planned) and the drawer which I need to make and fit.
I also sourced an ex caravan bedframe to make the junior over seat bed in the cab and pieces of another double front seat to allow me to add a second seatbelt to the twin rear seats.
My current focus is on items which prevent use of the vehicle as opposed to the nice to haves. This isn't stopping the collection of usefull bits though.
The vehicle has also seen some use on the road with trips varying from 400 miles one day to around 80 a few times for localish trips.
I had a problem on one of the trips when the valve on one of the wheels failed, luckily on a small road with a handy layby ahead. Only problem I still hadn't sourced a spare (it came with none). If anyone knows where I can get a 15 inch twin wheel Sprinter wheel cheap (don't care about the tyre), please shout.
That's all for today....
Since the last post I have refreshed the MOT. The was initially a failure on the fog light switch being loose (I was due to pick up a replace dash the following day so took a chance) and the number plate lights.
These lights are located on the fold out step and wired via brass/copper contacts that only make a connect when the step is folded away. As the step is quite worn the contact is hit and miss. The was on a Saturday so the tester gave me 2 hours to go away and rectify the two problems. The fog switch problem I resolved my knocking up a plywood insert for the dash in place of the broken plastic, whereas I ripped out the contacts and ran folding loom in for the steps. I know this isn't ideal but I intend to replace these steps with a proper motorhome type fold out set which should be much lighter (not being engineered for stretchers, etc).
I also managed to fit all the cupboard doors, the cooker and fridge (they've been in before, but are now in their final fix). The only remaining item on the cupboards are the shelves (simple 3mm ply planned) and the drawer which I need to make and fit.
I also sourced an ex caravan bedframe to make the junior over seat bed in the cab and pieces of another double front seat to allow me to add a second seatbelt to the twin rear seats.
My current focus is on items which prevent use of the vehicle as opposed to the nice to haves. This isn't stopping the collection of usefull bits though.
The vehicle has also seen some use on the road with trips varying from 400 miles one day to around 80 a few times for localish trips.
I had a problem on one of the trips when the valve on one of the wheels failed, luckily on a small road with a handy layby ahead. Only problem I still hadn't sourced a spare (it came with none). If anyone knows where I can get a 15 inch twin wheel Sprinter wheel cheap (don't care about the tyre), please shout.
That's all for today....
Sunday, 25 July 2010
Camper Part 31: Frankenseats 2
In part 1 of Frankenseats I reported on the successful completion of the the Volvo-Ford-Mercedes swivel bases.
Well, today I managed to assemble the seats back onto the bases and fitted them to the vehicle, having made wiring looms yesterday.
The pictures below show the seats in various orientations. As mentioned before, this version has the electrics working, but the swivel isn't quite sorted as the handle for the safety lock release needs to be made. Don't worry, the safety lock does engage, it's the disengaging that takes some effort (but I can do it, so swivel does work).
I haven't driven with these seats yet, but I fully expect them to be much more comfortable as I had one of the Volvo 960's for a while. The other bonus is that I didn't have to modify the handbrake mechanism as so many people seem to have to with the commercial swivels.
Monday, 12 July 2010
Camper Part 30: Frankenseats 1
And you all thought I'd forgotten about the camper.
It's been a bit of a juggling act with all my projects, but I tend to switch when I get stuck for one reason or another.
For the camper I figured I needed some swivelling seat bases. Having also once been the proud owner of a Volvo 960 with electric memory seats, I knew that these would be much nicer than that standard Sprinter seats. Especially in leather with a heater element.
Well, I managed to get some of the appropriate leather seats from Pete & Roger, and keeping an eye out on Ebay I managed to land a set of Ford Galaxy (same as the Seat Alhambra and VW Sharan) swivelling front seats at a decent price.
Then the surgery began. I stripped down the Galaxy seats to get at the swivel. Lots of measuring later I had figured out how to mate these to the Volvo seats and Sprinter bases. It's really handy that the sliding base unbolts from the Volvo seats allow easy working in the workshop (I only figured this out part way through the build though - which has been ongoing since December).
I ran into some trouble with one of the bases so had to aquire another seat from Roger. Luckily this was another driver seats which allowed me to fit both seats with the memory module and motors (the passenger seat is electric, but no memory).
Last night I eventually managed to finally assemble the frankenseat bases. The pictures below show a partially dismantled base while I was replacing the motors, followed by the two assembled bases.
The next instalment will see these fitted to the camper. Version 1 will have electrical control but no swivel as I still have to make a handle for releasing the safety catch. I do however need to use the vehicle so need to get the seats in.
Sunday, 18 October 2009
Camper Part 28: Oily bits today...
One of Kyle's friends from Milton Keynes invited him to his sleep-over birthday party yesterday so Lorraine and I had to agree on a strategy for the two 140 mile round trips.
I took the opportunity to spend yesterday at the workshop (which is outside Milton Keynes) with Pete, Mark and Roger as the friend's mom kindly agreed that Kyle could spend the whole day with them. Lorraine did the collecting and tied it in with visiting some friends in Milton Keynes.
As Peter had previously picked up a selection of filters (air, oil, fuel) for the Sprinter, I decided that this would be a good day to do the fluid changes which I had been putting.
On arrival at the workshop I first decided to do the weather sealing of the toilet door which I had also neglected since fitting the door a few weeks back. I removed the door and using my favourite sealant proceeded to seal in the ply spacers and then sealed the door frame in the place as well. I had to use some ply packers until the frame on the outside as well, as the door straddles the decorative recess in the side of the vehicle.
After this I changes the air filter and then drained the engine oil. Changing the oil filter was followed by the fuel filter and then a refill of the oil.
Pete encouraged me to also do the rear axle and gearbox oil as he had some in stock so I tackled that as well. Luckily it was quite a pleasant day and as the Sprinter is so high, it is easy to slide in underneath with no need to jack it up.
I did remember to first see if I could loosen the filling plugs on the axle and gearbox before doing the drain plugs. This can be a real problem if you don't and you then end up with a vehicle with no oil in the axle or gearbox and therefore no way to move it.
No pictures today, but I will try to get some of the toilet door all sealed up.
Today I ended up doing nothing much apart fro being a couch potato as I wasn't feeling great and I had to collect Luca from the airport at around 12. That took around 2 hours due to an accident on the M25. This afternoon we watched the Grand Prix instead of getting dirty.
I took the opportunity to spend yesterday at the workshop (which is outside Milton Keynes) with Pete, Mark and Roger as the friend's mom kindly agreed that Kyle could spend the whole day with them. Lorraine did the collecting and tied it in with visiting some friends in Milton Keynes.
As Peter had previously picked up a selection of filters (air, oil, fuel) for the Sprinter, I decided that this would be a good day to do the fluid changes which I had been putting.
On arrival at the workshop I first decided to do the weather sealing of the toilet door which I had also neglected since fitting the door a few weeks back. I removed the door and using my favourite sealant proceeded to seal in the ply spacers and then sealed the door frame in the place as well. I had to use some ply packers until the frame on the outside as well, as the door straddles the decorative recess in the side of the vehicle.
After this I changes the air filter and then drained the engine oil. Changing the oil filter was followed by the fuel filter and then a refill of the oil.
Pete encouraged me to also do the rear axle and gearbox oil as he had some in stock so I tackled that as well. Luckily it was quite a pleasant day and as the Sprinter is so high, it is easy to slide in underneath with no need to jack it up.
I did remember to first see if I could loosen the filling plugs on the axle and gearbox before doing the drain plugs. This can be a real problem if you don't and you then end up with a vehicle with no oil in the axle or gearbox and therefore no way to move it.
No pictures today, but I will try to get some of the toilet door all sealed up.
Today I ended up doing nothing much apart fro being a couch potato as I wasn't feeling great and I had to collect Luca from the airport at around 12. That took around 2 hours due to an accident on the M25. This afternoon we watched the Grand Prix instead of getting dirty.
Saturday, 29 August 2009
Camper Part 23: Wiring workout..
I took the Sprinter for a 285 mile roundtrip today. The longest single day trip since I bought it in May (and about 30% of the total mileage it has done in my ownership).
I spent most of the day at the workshop with Pete, Roger & Mark. This'll be the Pete and Mark who helped collect it and dismember the donor caravan.
Being a more than competent automotive electrician, Roger helped me figure out which of the remaining ambulance wiring could be culled without rendering the vehicle undrivable and still retaining the auxilliary battery and split charging system. During this we removed the battery kill switch, and having discovered that this included an alternator kill switch, removed this at the same time.
While I was culling wires, Pete volunteered to the fit the blind spot mirrors which he had picked up for me at the local Mercedes dealership. Another example of checking before you Ebay, as he was able to buy them cheaper from the main dealer than guys are selling them for on Ebay (and no P&P to pay).
I also picked up a set of electric Volvo 960 seats from Roger as he was breaking a 960 to supply bits for his supercharged (we still working on convincing him it'll be too slow) V90.
The driver's seat has 3 memory position settings which will come in handy with Lorraine and I both driving the Sprinter (this is one of the main reasons for the change). Also the Sprinter passenger seat doesn't have any back and forth adjustment, so fitting the Volvo seat will give this (also electrical).
Pete kindly took a few pictures of the activities during the day, including one of our 3 Sprinters lining up and smiling for the camera...

I spent most of the day at the workshop with Pete, Roger & Mark. This'll be the Pete and Mark who helped collect it and dismember the donor caravan.
Being a more than competent automotive electrician, Roger helped me figure out which of the remaining ambulance wiring could be culled without rendering the vehicle undrivable and still retaining the auxilliary battery and split charging system. During this we removed the battery kill switch, and having discovered that this included an alternator kill switch, removed this at the same time.
While I was culling wires, Pete volunteered to the fit the blind spot mirrors which he had picked up for me at the local Mercedes dealership. Another example of checking before you Ebay, as he was able to buy them cheaper from the main dealer than guys are selling them for on Ebay (and no P&P to pay).
I also picked up a set of electric Volvo 960 seats from Roger as he was breaking a 960 to supply bits for his supercharged (we still working on convincing him it'll be too slow) V90.
The driver's seat has 3 memory position settings which will come in handy with Lorraine and I both driving the Sprinter (this is one of the main reasons for the change). Also the Sprinter passenger seat doesn't have any back and forth adjustment, so fitting the Volvo seat will give this (also electrical).
Pete kindly took a few pictures of the activities during the day, including one of our 3 Sprinters lining up and smiling for the camera...

Friday, 14 August 2009
Camper Part 21: MOT Passed...
No pictures in this update. The Sprinter went in for the re-test this morning and passed.
As expected there was an advisory issued on one of the brake pipes (this was highlighted during the initial test as well). I plan on replacing this and any other pipes needed when I get it up to Milton Keynes for a full service. (Peter has a brake pipe flaring tool).
That's all for today folks!!
As expected there was an advisory issued on one of the brake pipes (this was highlighted during the initial test as well). I plan on replacing this and any other pipes needed when I get it up to Milton Keynes for a full service. (Peter has a brake pipe flaring tool).
That's all for today folks!!
Saturday, 8 August 2009
Sprinter 412D twin wheel rear brake overhaul
Here is a blow-by-blow, picture-by-picture account of the overhaul of the rear brakes on my 1998 Mercedes 412D twin wheel Sprinter.
I ordered the parts from the local motor factors that we normally use who are able to look up the vehicle based on registration number. Turns out their system is flawed and the parts they supplied were for the single wheel Sprinters. I then went to another supplier, ditto, same thing. I decided to stop wasting my time and went straight to Mercedes and walked out with rights parts 10 minutes after walking in. Strangely while my arms were loaded down with 2 really heavy discs and a set of pads, my wallet felt lighter by the same amount.
Please Note/Disclaimer: This article is a description of the work I did to my vehicle and in no way constitutes advice to work on your own. If you are not an experienced mechanic then please get an experienced mechanic to work on your vehicle for you. No liability can be accepted for anyone attempted to replicate anything shown on this blog.
This job was started by chocking the vehicle, jacking it up, putting some stands under and removing the rear wheels (one side at a time). The handbrake was released and cable cam adjuster (underneath in the center of the vehicle slackened off.
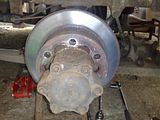
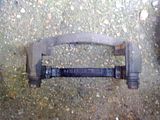
I proceeded to remove the 'wheel carrier' (for want of a better name), the caliper and the caliper bracket. The wheel carrier is removed by removing 6 19mm bolts located around the center of hub. The bolts came loose easily, but I needed to 'tap' the carrier with a 4 pound hammer to get it to pop off.
The caliper comes off the bracket by removing two 13mm bolts from the sliders which need to be held with a 17mm spanner. I tied the caliper up and rested it on the leafspring to ensure flexi hose didn't twist or become damaged. This came off easily. The old pads can be removed at this time.
The caliper bracket is held on with two 19mm bolts. The lower one came loose after only about 30 mins of fighting with it. This involved copious amounts of easing fluid (I didn't mind contaminating anything in brakes as all were being replaced). The upper one onf the other hand required copious spraying, lots of swearing, heaving and pulling on a long cracker bar. As I had started the one side the night before, it benefitted from having been sprayed some hours before and then soaking. For the other side I didn't want to wait 12 hours so after much effort I eneded up heating it with a blow torch. (CAREFULLY: I made sure I had a fire extinguisher, and directly the blow torch only at the bracket which wasn't near any seals or brake parts - the caliper already have been safely moved out of the way).
For each side I spent as much time on the top caliper bracket bolt as on the rest of the stripdown put together.
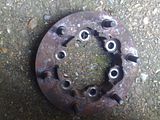
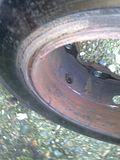
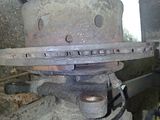
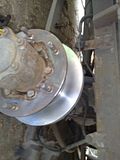
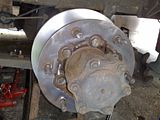
I then proceeded to remove the disc. First ensuring the vehicle was out of gear so the disc could rotate. This allowed me to slacken off the adjustment on the shoes to ensure they weren't binding on the drum section. As the drums wear and dirt and rust builds up a slight ridge is formed on the rear which can grip the shoes. Even with the adjuster totally slackened off and being able to see that the shoes were free (see pictures), it still took a lot of 'tapping' with the 4lb hammer to get the disc off as it has a reasonably close fit on the hub.

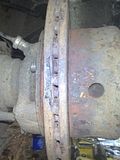
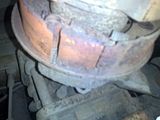
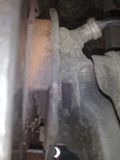
On removal of the disc I was able to properly inspect and then remove the handbrake shoes. I took pictures of these in situ in order to ensure that I didn't get the springs, etc confused but they are all pretty straightforward.

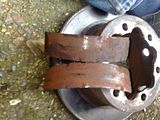
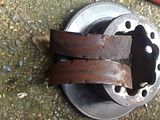
As can be seen from the pictures the shoes were totally down to the metal and had been eating away at the drum section of the disc.

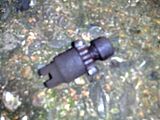
In preparation for the re-assembly I stripped down the adjuster. It pulls apart and the toothed section can be unscrewed. I then coated all the working parts with anti-seize compound and worked them back and forth onre-assembly to ensure that the fully working range was free. I also unpacked the new shoes at this point and took a 'new vs old' picture.

Re-assembly of the brake system then began by fitting the new shoes, this is simply a 'Haynes manual' approach of reversing the disassembly procedure (BTW: I didn't have a manual so tackled this using common sense and the advise of the friend on specifics, but I do have extensive experience of working on cars as a hobby). Make sure that the adjuster is wound back fully.
To assist with hooking the springs in I took an old coat hanger and fashioned a hook with it (a trick my father used in the lifetime he spent running a commercial garage).

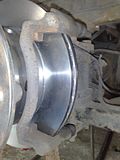
Next up the new disc went on. This was first cleaned with some 'brake and clutch' cleaner to ensure it wasn't covered in oil/grease. Having said that I found these (Mercedes) discs to appear to be a lot cleaner than the motor factor supplied discs on which you tend to detect the protective layer. Mercedes supply these in a protective plastic bag inside the box.
Before bolting on the wheel carrier I cleaned it up with a wire brush. This was then bolted back using thread locking compound on the 6 19mm bolts.

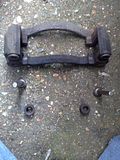
In preparation for refitting the caliper bracket, I stripped the sliders down. These can be prone to siezing (more so on some vehicles than others) if not serviced properly. It is pretty simply to do, they simply pull out and the dust cover pulls off. I cleaned them off with an old rag and then coated liberally with anti-sieze compound. Re-assembly followed during which I worked them back and forth to ensure that the anti-sieze was spread evenly inside and that they were functional. I also cleaned the heads of the sliders to ensure that spanner would fit on any of the faces.
I re-fitted the bracket to the hub with the 2 19mm bolts and some thread locking compound (don't want brake parts coming loose). The area of the caliper bracket where the pads slide was also cleaned as even small amounts of build in these areas can cause the pads to stick which can reduce braking efficiency dramatically.

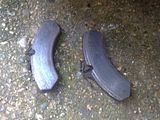
Before refitting the caliper and the new pads, the pistons needed to be pushed back. Luckily they weren't extended too far as the pads on the vehicle were only about 5-10% worn. I don't know why they didn't replace the discs when they puts these pads on as they can't have been on for very long (especially as this was an ambulance). I could have re-used the old pads, but will rather put them on the shelf for the next time as I think new discs deserve new pads.
On advice from my friend Peter, I attached a bleed hose to the bleed nipple and cracked that open while pushing the pistons back with a clamp. This would ensure that the old fluid escapes rather than being push back up the line into the ABS system.
The picture below also shows where the new sensor wire plugs into a recptor on the caliper (They didn't bother with the wires during the last pad replacement). You should however fit the sensor wire to the pad first (I learnt this the hard way).


The pads were then slid into place and the caliper remounted using the 13mm bolts. As I had bought the pads from Mercedes thay came with new bolts that have a thread compound pre-applied. If you are re-using the old bolts, make sure you use some thread locking compound on these safety critical parts. The sensor wire was fed through the hole in the caliper and plugged in.

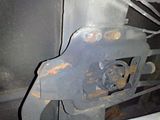
The final step before refitting the wheels and repeating the procedure on the other side was to adjust the handbrake shoes. This was done by turning the disc to align the adjustment hole with the 'geared' adjuster wheel (just visible in the picture).
The adjuster was wound out using a screw driver until the handbrake shoes held the disc. It was then freed off again until just free. Remember that I had slackened off the cable adjustment under the vehicle prior to this. Once both wheels had been completed I adjusted the cable adjuster under the vehicle (picture below - this is done by releasing the 13mm bolt, twisting the cam - using an allen spanner - and the tightening the 13mm bolt) until the handbrake lever took with about 5 clicks. I also sprayed the cable adjuster liberrally with anti-sieze spray. I intend to remove and service this at the next service, but don't believe this needs to be done for the MOT re-test.

I ordered the parts from the local motor factors that we normally use who are able to look up the vehicle based on registration number. Turns out their system is flawed and the parts they supplied were for the single wheel Sprinters. I then went to another supplier, ditto, same thing. I decided to stop wasting my time and went straight to Mercedes and walked out with rights parts 10 minutes after walking in. Strangely while my arms were loaded down with 2 really heavy discs and a set of pads, my wallet felt lighter by the same amount.
Please Note/Disclaimer: This article is a description of the work I did to my vehicle and in no way constitutes advice to work on your own. If you are not an experienced mechanic then please get an experienced mechanic to work on your vehicle for you. No liability can be accepted for anyone attempted to replicate anything shown on this blog.
This job was started by chocking the vehicle, jacking it up, putting some stands under and removing the rear wheels (one side at a time). The handbrake was released and cable cam adjuster (underneath in the center of the vehicle slackened off.
I proceeded to remove the 'wheel carrier' (for want of a better name), the caliper and the caliper bracket. The wheel carrier is removed by removing 6 19mm bolts located around the center of hub. The bolts came loose easily, but I needed to 'tap' the carrier with a 4 pound hammer to get it to pop off.
The caliper comes off the bracket by removing two 13mm bolts from the sliders which need to be held with a 17mm spanner. I tied the caliper up and rested it on the leafspring to ensure flexi hose didn't twist or become damaged. This came off easily. The old pads can be removed at this time.
The caliper bracket is held on with two 19mm bolts. The lower one came loose after only about 30 mins of fighting with it. This involved copious amounts of easing fluid (I didn't mind contaminating anything in brakes as all were being replaced). The upper one onf the other hand required copious spraying, lots of swearing, heaving and pulling on a long cracker bar. As I had started the one side the night before, it benefitted from having been sprayed some hours before and then soaking. For the other side I didn't want to wait 12 hours so after much effort I eneded up heating it with a blow torch. (CAREFULLY: I made sure I had a fire extinguisher, and directly the blow torch only at the bracket which wasn't near any seals or brake parts - the caliper already have been safely moved out of the way).
For each side I spent as much time on the top caliper bracket bolt as on the rest of the stripdown put together.
I then proceeded to remove the disc. First ensuring the vehicle was out of gear so the disc could rotate. This allowed me to slacken off the adjustment on the shoes to ensure they weren't binding on the drum section. As the drums wear and dirt and rust builds up a slight ridge is formed on the rear which can grip the shoes. Even with the adjuster totally slackened off and being able to see that the shoes were free (see pictures), it still took a lot of 'tapping' with the 4lb hammer to get the disc off as it has a reasonably close fit on the hub.
On removal of the disc I was able to properly inspect and then remove the handbrake shoes. I took pictures of these in situ in order to ensure that I didn't get the springs, etc confused but they are all pretty straightforward.
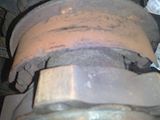
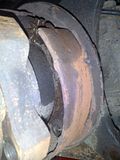
As can be seen from the pictures the shoes were totally down to the metal and had been eating away at the drum section of the disc.
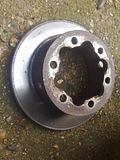
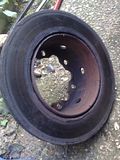
In preparation for the re-assembly I stripped down the adjuster. It pulls apart and the toothed section can be unscrewed. I then coated all the working parts with anti-seize compound and worked them back and forth onre-assembly to ensure that the fully working range was free. I also unpacked the new shoes at this point and took a 'new vs old' picture.
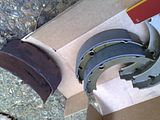
Re-assembly of the brake system then began by fitting the new shoes, this is simply a 'Haynes manual' approach of reversing the disassembly procedure (BTW: I didn't have a manual so tackled this using common sense and the advise of the friend on specifics, but I do have extensive experience of working on cars as a hobby). Make sure that the adjuster is wound back fully.
To assist with hooking the springs in I took an old coat hanger and fashioned a hook with it (a trick my father used in the lifetime he spent running a commercial garage).
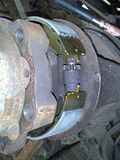
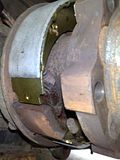
Next up the new disc went on. This was first cleaned with some 'brake and clutch' cleaner to ensure it wasn't covered in oil/grease. Having said that I found these (Mercedes) discs to appear to be a lot cleaner than the motor factor supplied discs on which you tend to detect the protective layer. Mercedes supply these in a protective plastic bag inside the box.
Before bolting on the wheel carrier I cleaned it up with a wire brush. This was then bolted back using thread locking compound on the 6 19mm bolts.
In preparation for refitting the caliper bracket, I stripped the sliders down. These can be prone to siezing (more so on some vehicles than others) if not serviced properly. It is pretty simply to do, they simply pull out and the dust cover pulls off. I cleaned them off with an old rag and then coated liberally with anti-sieze compound. Re-assembly followed during which I worked them back and forth to ensure that the anti-sieze was spread evenly inside and that they were functional. I also cleaned the heads of the sliders to ensure that spanner would fit on any of the faces.
I re-fitted the bracket to the hub with the 2 19mm bolts and some thread locking compound (don't want brake parts coming loose). The area of the caliper bracket where the pads slide was also cleaned as even small amounts of build in these areas can cause the pads to stick which can reduce braking efficiency dramatically.
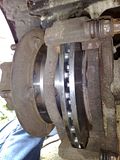
Before refitting the caliper and the new pads, the pistons needed to be pushed back. Luckily they weren't extended too far as the pads on the vehicle were only about 5-10% worn. I don't know why they didn't replace the discs when they puts these pads on as they can't have been on for very long (especially as this was an ambulance). I could have re-used the old pads, but will rather put them on the shelf for the next time as I think new discs deserve new pads.
On advice from my friend Peter, I attached a bleed hose to the bleed nipple and cracked that open while pushing the pistons back with a clamp. This would ensure that the old fluid escapes rather than being push back up the line into the ABS system.
The picture below also shows where the new sensor wire plugs into a recptor on the caliper (They didn't bother with the wires during the last pad replacement). You should however fit the sensor wire to the pad first (I learnt this the hard way).
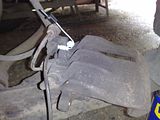
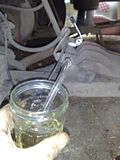
The pads were then slid into place and the caliper remounted using the 13mm bolts. As I had bought the pads from Mercedes thay came with new bolts that have a thread compound pre-applied. If you are re-using the old bolts, make sure you use some thread locking compound on these safety critical parts. The sensor wire was fed through the hole in the caliper and plugged in.
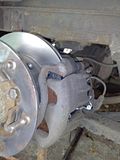
The final step before refitting the wheels and repeating the procedure on the other side was to adjust the handbrake shoes. This was done by turning the disc to align the adjustment hole with the 'geared' adjuster wheel (just visible in the picture).
The adjuster was wound out using a screw driver until the handbrake shoes held the disc. It was then freed off again until just free. Remember that I had slackened off the cable adjustment under the vehicle prior to this. Once both wheels had been completed I adjusted the cable adjuster under the vehicle (picture below - this is done by releasing the 13mm bolt, twisting the cam - using an allen spanner - and the tightening the 13mm bolt) until the handbrake lever took with about 5 clicks. I also sprayed the cable adjuster liberrally with anti-sieze spray. I intend to remove and service this at the next service, but don't believe this needs to be done for the MOT re-test.
Thursday, 6 August 2009
Camper Part 20: Poorly Patient.....
Short update today as not much news since the MOT.
As expected (but not hoped) the Sprinter failed the MOT. The worse issue was the rear brakes which failed on both the brakes and the handbrake. Apart from that the odd light was deemed faulty and the wipers not good enough. I had checked the lights the night before, but can't fault them on the rest.
Today Lorraine went and picked up the parts to do a complete rear brake overhaul, but I am taking it easy in the evenings as we have managed to book an alternate holiday for next week, so the pressure is off.
I don't want to slack off too much though as I want the van done for weekend trips. On Saturday I will be tackling the brakes, which hopefully leaves Sunday for the lights meaning that I can book it in for a re-test on Friday. (We're away from Monday to Thursday).
As expected (but not hoped) the Sprinter failed the MOT. The worse issue was the rear brakes which failed on both the brakes and the handbrake. Apart from that the odd light was deemed faulty and the wipers not good enough. I had checked the lights the night before, but can't fault them on the rest.
Today Lorraine went and picked up the parts to do a complete rear brake overhaul, but I am taking it easy in the evenings as we have managed to book an alternate holiday for next week, so the pressure is off.
I don't want to slack off too much though as I want the van done for weekend trips. On Saturday I will be tackling the brakes, which hopefully leaves Sunday for the lights meaning that I can book it in for a re-test on Friday. (We're away from Monday to Thursday).
Subscribe to:
Posts (Atom)