At that point, while I had created the carcasses, fitted sides, counter tops and the cooker and fridge. I had not yet actually panelled the front or fitted doors, drawers, etc.
The plan was to fit a complete sheet of 3mm plywood over the front of the carcass and then cut out the holes. This means that there will be few or no join lines on the front surface of the units. It also means that I could use the pieces cut out of the holes as the infill panels on the doors.
Earlier this year (just as the snow stopped) I started on the camper again and this was the job I tackled. Once I had the holes cut out (I can't get pictures right now as the camper is acting as storage for it's constituent bits), I was able to measure up the door sizes.
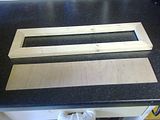
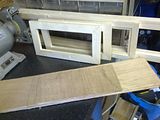
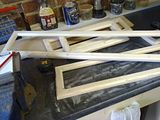
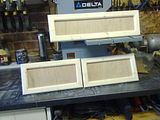
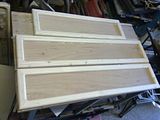
The doors are made of 32mm x 16mm pine batten (similar to what was used for the carcasses). The battens are formed into a rectangle with the left over plywood as an infill panel (kind of like a picture frame). This allows the door to overlap the carcass by around 10mm all round.
I decided I didn't want to get to fancy on the detailing as this is a budget camper, so the approach I took was as follows:
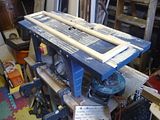
- Using my home table saw (I made a table to fit by handheld circular saw to), I cut a 3mm rebate into the batten for recessing the 3mm ply into later.
- I cut all the pieces to length with a 45 degree angle on each end for joining up. I tried to do this with a hand saw and normal mitre box, but its difficult to be accurate so I bought a cheap motorised mitre box (i.e. basic chop saw) on Ebay. It's amazing how much easier things are with the right tools.
- I had bought a band clamp from B&Q, so over the period of a week I clamped up all 6 frames (each had to stay in the clamp for at least 12 hours).
- The next step was to cut the plywood accurately to size. I did this by finding the center and measuring out from there so that the visible grain will match the carcasses. I did the cutting on my new (to me) band saw (Ebay again, it came with 3 spare blades and half the new price). Again proving the benefits of the right tools as there was no splitting of the ply as when cut by hand.
- The frames where then sanded to level out any gluing imperfections and then using a round over router bit in my new (to me) (Ebay) router table I rounded over the inside and outside edges.
- The final step was to glue and pin the ply insets into the frames. When they are dry Lorraine will help by doing the varnishing (she's the painter in the family). The carcasses will be done at the same time as they have already been sanded and are waiting for this point in time.
If the above is unclear then hopefully the following pictures will help make it clear.
Hinges and handles will only go on when they are fitted. The 3 smaller ones fit horizontally while the other 3 are vertical (i.e. the grain is always vertical). The narrower of the two smaller ones go under the sink. One will be a drawer front (under the draining board), while the other will be a false front, but I will make it open to give access to a shallow space above the fridge which will allow for storage of paperwork, etc.



No comments:
Post a Comment