One of Kyle's friends from Milton Keynes invited him to his sleep-over birthday party yesterday so Lorraine and I had to agree on a strategy for the two 140 mile round trips.
I took the opportunity to spend yesterday at the workshop (which is outside Milton Keynes) with Pete, Mark and Roger as the friend's mom kindly agreed that Kyle could spend the whole day with them. Lorraine did the collecting and tied it in with visiting some friends in Milton Keynes.
As Peter had previously picked up a selection of filters (air, oil, fuel) for the Sprinter, I decided that this would be a good day to do the fluid changes which I had been putting.
On arrival at the workshop I first decided to do the weather sealing of the toilet door which I had also neglected since fitting the door a few weeks back. I removed the door and using my favourite sealant proceeded to seal in the ply spacers and then sealed the door frame in the place as well. I had to use some ply packers until the frame on the outside as well, as the door straddles the decorative recess in the side of the vehicle.
After this I changes the air filter and then drained the engine oil. Changing the oil filter was followed by the fuel filter and then a refill of the oil.
Pete encouraged me to also do the rear axle and gearbox oil as he had some in stock so I tackled that as well. Luckily it was quite a pleasant day and as the Sprinter is so high, it is easy to slide in underneath with no need to jack it up.
I did remember to first see if I could loosen the filling plugs on the axle and gearbox before doing the drain plugs. This can be a real problem if you don't and you then end up with a vehicle with no oil in the axle or gearbox and therefore no way to move it.
No pictures today, but I will try to get some of the toilet door all sealed up.
Today I ended up doing nothing much apart fro being a couch potato as I wasn't feeling great and I had to collect Luca from the airport at around 12. That took around 2 hours due to an accident on the M25. This afternoon we watched the Grand Prix instead of getting dirty.
Sunday 18 October 2009
Sunday 11 October 2009
Lorraine's Lair: Boarding battles
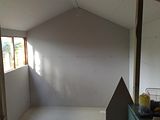
Following on from last week's insulation game, this week I got cracking with fitting the plasterboard to the walls and ceilings.
Strategic placement of the noggins and supplementary battens meant that these went up pretty quickly and could be following by laying battens on the floor, insulating and laying the chipboard floorboards.
The frustrating bit about the floor boards is that I had to buy a whole sheet to only use about 200mm of it, but I'll use the rest for shelving or something sometime.
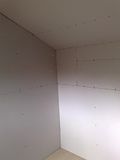
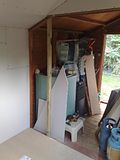
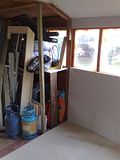
As the pictures (taken on Saturday) will show, the interior dividing wall still hasn't been done, but a start has been made a two of the vertical studs in place. I had been scouring Freecycle for an internal door, as I don't want to fit the final stud until I know how wide the door will be. Yes I know they're normally a standard size, but when you're going for freebies, it's best to wait and see what you get.
Late last night I spotted a posting offering some internal doors and some plasterboard. I called to ask if I could have them and was rewarded with a yes. Early this morning I made my way across the village and picked up a pair of doors and two offcuts of plasterboard.
The plasterboard was in a bad way and 12.5mm but as I seem to have miscalculated somewhere and not accounted for the interior wall at all (I think it's actually the ceiling I forgot), I thought I'd see how I got on with this. I finished off the day's work by hanging the door and fitting the 3rd stud as the other side of the door frame. I had to trim about 30 off the bottom of the door, but as it is a solid wood door with panes of glass in, and the bottom was broader than the top, this actually makes it look more correct.


Sunday 4 October 2009
Lorraine's Lair: In the beginning..
As if I didn't have enough DIY projects on my plate, with Lorraine's birthday coming up and winter drawing ever closer I decided that I would fulfil her wish of converting half of the shed into a 'studio' come craft room.
The shed is 14ft by 8ft with windows down the one side. Converting half of it would result in a 7ft by 8ft room which should be ample for a spot of painting, crafts or simply relaxing with a book.
Not being able to sleep yesterday morning, I woke up and 1am and downloaded Google Sketchup so that I could draw a layout and figure out materials. Having used Autocad back in my university days (I studied Mechanical Engineering), all I can say about Sketchup is It's Brilliant! When you need to do something quickly, you don't want to spend ages learning how the software works, and this does the trick.
Having a fair idea of the materials needed, we climbed into the Sprinter and made our way to the big B&Q off the A3 at New Malden.
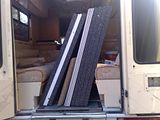
I purchased 35mm black Jablite for insulating the walls and ceiling, 25mm white Jablite for the floor, some chipboard flooring and 9mm plasterboard. Lorraine also chose some paint and wall paper (one of the wall will be papered).
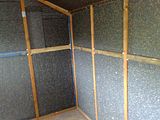
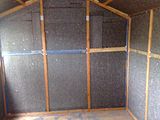
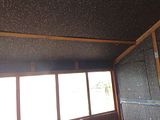
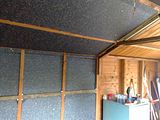
This morning we got cracked quite early with me fitting 'noggins' (horizontal battens) between the shed's existing vertical battens while Lorraine followed behind and cut and fitted Jablite (can't expect her not to earn her present now can we!!).
By the end of the day we had the three exterior walls and ceiling insulated. I decided to fit the dividing wall last as this would give greater access for the 2.4m sheets of plasterboard.


Subscribe to:
Posts (Atom)
