Step 5: Upload Firmware (or more accurately, installing the Arduino/Sanguino software on my PC)
According to the HowTo page, the boards come with the Makerbot firmware installed. This means that a boot-loader doesn't have to be installed, but the firmware must be updated. This is a new area for me. I am a software developer by trade, but for Windows, not embedded so haven't had to do this before.
I found the Microcontroller firmware installation page on the wiki, so started by following those steps and installed:
- the Arduino software (release 0018);
- Download the zip;
- Extract and move to your desired location;
- Create shortcut (if you want) - I'm waiting till I figure out how to run it.
- followed by Zach's Sanguino extensions.
- Download the zip;
- Extract and move the Sanguino folder into the Arduino/hardware folder.
Before actually programming the boards, you also need to download the latest stable release of the firmware. This is located in the reprap-mendel-yyyymmdd.zip that is installed when installing the Reprap Host software. Guess that means a quick side track. Don't go away.
Step 6: Install Reprap Host Software
Following the instructions on the 'installing the Reprap Host software' wiki page, I did the following (bear in mind that I am starting with a relatively fresh XP installation on the machine I am using for this):
- Installed Java 6 from http://java.com/
- Installed the RepRap Host software from sourceforge (reprap-mendel-20100702.zip)
- Quite easy really, unpack the zip to a suitable location and run the reprap.bat to run the software.
- As I decided not to install in Program Files, I had to edit the batch file. The instructions don't mention this, even though they word it as if installing in Program Files is optional. (I might go edit the wiki if I can figure out how).
- Check out which other Useful Software Packages you need.
Ok, that means I now have the firmware needed to continue with setting up the electronics.
Step 7: Wiring wonders & woes
This forum post by rhmorrison refers to faulty soldering almost blowing his electronics, but more importantly, he describes that moving the stepper motors before powering the electronics will like up the corresponding LED (kind of like the electric motor light bulb generator we all made as kids).
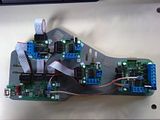
Because of this I decided to do the inter board wiring before hooking up any power to the boards. There seems to be no one clear description and image of this all working. I referenced the following:
- Nudel's ground pin image. (Shows the stepper to main board connections).
- The Tech Zone Official Electronics Installation Page. (Shows the extruder controller to main board connections)
- The Tech Zone HowTo page.
For what it's worth my LED's all lit up when tested by moving the stepper back and forth.
For what's it worth, I will be changing the I2C wiring (one of the 2 wire connectors between the main board and extruder controller) to include a ground wire following Mdbaughman2's experiences.
Step 8: Getting connected
The Ho
On my board, there is what would appear to be two pins that have been permanently shorted/bridged, there are also no connectors for external power, so I figured the board is permanently configured to be USB powered (don't know what this means for using the SD card slot then). Anyway, I figured the best was to give it a go.
Having kept the Arduino Getting Started w/ Arduino on Windows page open since installing the software, I followed the steps on there. Basically the following:
- Plug in the USB connector to your PC;
- When prompted for drivers point to your Arduino/drivers folder (or check the FTDI site for newer ones);
- Open the Arduino application, and revert to the Microcontroller firmware installation instructions (see next step).
Step 9: Loading the firmware (eventually)
I could eventually continue following the steps under the Programming the Motherboard heading on the Microcontroller firmware installation page.
I followed these steps (any folder locations refer to sub-folders off Reprap\mendel\firmware\FiveD_GCode):
- Copied configuration.h.dist to configuration.h in the FiveD_GCode_Interpreter and Extruder folders
- Load the FiveD_GCode_Interpreter/FiveD_GCode_Interpreter.pde sketchbook
- Modified the configuration.h tab to match my setup (guessed most of it as I don't know what applies yet - it seems to be pretty much setup for the v3 electronics which the TechZone stuff is - For the hardware, I left it as standard for now, but will need to change when I figure out the steps, etc on the ScrapStrap) and saved.
- Selected the Tools->Board->Sanguino board and then Sketch->Verify/Compile
- My board was still connected to the PC from Step 8. (if your's isn't, reconnect now).
- Selected Upload to I/O Board and ... It fails!!
avrdude: stk500_getsync(): not in sync: resp=0x00
avrdude: stk500_disable(): protocol error, expect=0x14, resp=0x51
More in Part 3...


No comments:
Post a Comment