Once upon a time...

Once upon a time...
Christmas 2016

Sunday 25 July 2010

Camper Part 31: Frankenseats 2

In part 1 of Frankenseats I reported on the successful completion of the the Volvo-Ford-Mercedes swivel bases.

Well, today I managed to assemble the seats back onto the bases and fitted them to the vehicle, having made wiring looms yesterday.

The pictures below show the seats in various orientations. As mentioned before, this version has the electrics working, but the swivel isn't quite sorted as the handle for the safety lock release needs to be made. Don't worry, the safety lock does engage, it's the disengaging that takes some effort (but I can do it, so swivel does work).

I haven't driven with these seats yet, but I fully expect them to be much more comfortable as I had one of the Volvo 960's for a while. The other bonus is that I didn't have to modify the handbrake mechanism as so many people seem to have to with the commercial swivels.


Volvo seats in a sprinterDrivers seat at 90 degreesPassenger seat facing the back

Tuesday 20 July 2010

Tech Zone Techniques - Part 4

Step 10: Wiring the steppers
Not much to go wrong here really, as I had wired the stepper sup to my CNC stepper boards before, I kind of knew what I was doing. I also made up a power lead which I have wired up to my variable bench supply for now. (This will be replaced with a PC based ATX supply for the final version).

Step 11: Testing Times
Next up was testing the electronics. I tracked down the Testing RepRap Electronics page on the wiki and started following that through.

I ran into some trouble with the motherboard not returning any temperature results and not looping, so I asked on the forum. In summary, note the following when using the hardware:
  • If you don't get the temperature readings looping, then your USB cable may not be autoresetting the hardware
  • Plug in the the USB
  • Hit the rest button
  • Start up the host software
So, I managed to get the desired results for the motherboard and the extruder controller (sans stepper driving), so I decided to move onto to testing the stepper boards and opto's.

For the steppers I followed these steps (for each axis - results further down) (BTW: follow these steps at your own risk, the wiki steps are more detailed and isolate issues, I already knew my steppers work):
  1. Wired the stepper to the controller
  2. Ensured the stepper was in the middle of the axis (as I wouldn't know which way it would travel)
  3. Wired the power to the stepper board
  4. Wired the stepper board to the motherboard
  5. Connected the USB
  6. Reset the motherboard
  7. Opened the RepRap Host
  8. Changed to the XYZ tab, and set nudge to 10mm and feedrate to 300mm/min
  9. Switched on the power
  10. Clicked the right arrow (>)
  11. Clicked the left arrow (<)
  12. Moved on to testing the Opto's
Y-Axis results
  • I did the Y-Axis first as it made sense in my wiring config
  • > caused a small movement (and was repeatable)
  • <>
  • Off to the forum to figure out what's wrong (read about this before somewhere)
  • Ah... Seems I got the Opto connected the wrong way around. The picture wasn't very clear (that's my story and I'm sticking with it).
  • While fiddling with this I noticed that the opto LED (which on the TechZone boards is normally on) was not switching off when blocked.
  • I swapped out the other opto's and found that 2 of my three boards had the same problem.
  • I've been trying to stay out of the TechZone flaming that's been happening on the forum (I won't post any links, searching for TechZone will find many), but I do think the quality of the soldering leaves something to be desired. I spent a lot of my spare cash with them (it's the single biggest purchase in my project) and wasn't too impressed. I reckon could do it neater and I only tend to solder copper pipes for plumbing and automotive wiring.
  • Anyway, off to figure out how to fix my opto's (given I know next to nothing about electronics, this will be interesting).
Following on from the Y-axis, I had mixed results with the others. I eventually figured out that I had to tweak the pot on the stepper boards to get the steppers running properly. I turned them anti-clockwise a bit at a time until they didn't work and then back a bit till they did again.

I then found that my Z-axis motor would run great when the belt was freed off, but wouldn't run the axis. I have just located a more powerful motor on my scrapheap as my Z-axis doesn't even have the extruder mounted yet. (May have the go the bowden route).

Current state of play is X & Y axes work. Z-axis being fiddled with....

Wednesday 14 July 2010

Tech Zone Techniques - Part 3

Following on from Part 2, I'm still trying to get my electronics moving in the right direction.

Step 9: Loading the firmware (still....)
During the last post I was trying to load the firmware and got an error not in sync...

I searched the forum and found this post. Reading through it I saw the following line "Wrong serial port in use for USB connection", and thought "I didn't set the serial port, so how will it know?", obviously it didn't. The Arduino IDE was set to COM1, not COM5 as it needs to be on my system.

I changed that and hit the upload button. Done in seconds. Boy was that dumb... 3 days of wondering what I did wrong (ok, I didn't come back and work on it for the 3 days as I was doing other stuff, but it still bugged me).

Ok, onwards and upwards, lets program that extruder, here are the steps followed:
  1. I had already copied the configuration.h.dist to configuration.h in the Extruder folder
  2. Moved the USB board to the extruder controller, remembered to invert it (ground is on the opposite side.
  3. Loaded the Extruder/Extruder.pde sketchbook.
  4. Modified the configuration.h tab to match my setup (left it all standard as I didn't see anything relevant to change) and saved.
  5. Checked the temperature.h tab as I am running a thermistor. I wasn't sure is the default table is correct or not, so I left it be for now.
  6. Selected the Tools->Board->Arduino Diecimila, Duemilanove or Nano w/ ATmega 168 board and then Sketch->Verify/Compile
  7. My board was still connected to the PC from 2 above
  8. Selected Upload to I/O Board and it worked!!!
  9. Disconnected the USB and moved it back the main board
At this point I'd had enough for the day and decided to call it quits. Part 4 will start with wiring up the steppers, connecting some power and some ground lines as mentioned above.

Monday 12 July 2010

Camper Part 30: Frankenseats 1

And you all thought I'd forgotten about the camper.

It's been a bit of a juggling act with all my projects, but I tend to switch when I get stuck for one reason or another.

For the camper I figured I needed some swivelling seat bases. Having also once been the proud owner of a Volvo 960 with electric memory seats, I knew that these would be much nicer than that standard Sprinter seats. Especially in leather with a heater element.

Well, I managed to get some of the appropriate leather seats from Pete & Roger, and keeping an eye out on Ebay I managed to land a set of Ford Galaxy (same as the Seat Alhambra and VW Sharan) swivelling front seats at a decent price.

Then the surgery began. I stripped down the Galaxy seats to get at the swivel. Lots of measuring later I had figured out how to mate these to the Volvo seats and Sprinter bases. It's really handy that the sliding base unbolts from the Volvo seats allow easy working in the workshop (I only figured this out part way through the build though - which has been ongoing since December).

I ran into some trouble with one of the bases so had to aquire another seat from Roger. Luckily this was another driver seats which allowed me to fit both seats with the memory module and motors (the passenger seat is electric, but no memory).

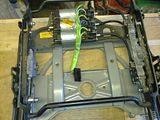
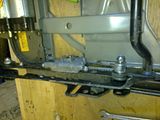
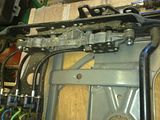
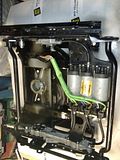
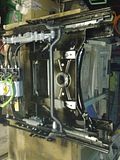
Last night I eventually managed to finally assemble the frankenseat bases. The pictures below show a partially dismantled base while I was replacing the motors, followed by the two assembled bases.

Seat base showing motorsSeat base showing motor fixingsSeat base showing motor fixings
Frankenseat base 2Frankenseat base 1

The next instalment will see these fitted to the camper. Version 1 will have electrical control but no swivel as I still have to make a handle for releasing the safety catch. I do however need to use the vehicle so need to get the seats in.

Sunday 11 July 2010

Tech Zone Techniques - Part 2

Following on from Part 1, I'm continuing to try to get my electronics moving in the right direction.

Step 5: Upload Firmware (or more accurately, installing the Arduino/Sanguino software on my PC)
According to the HowTo page, the boards come with the Makerbot firmware installed. This means that a boot-loader doesn't have to be installed, but the firmware must be updated. This is a new area for me. I am a software developer by trade, but for Windows, not embedded so haven't had to do this before.

I found the Microcontroller firmware installation page on the wiki, so started by following those steps and installed:
  1. the Arduino software (release 0018);
    • Download the zip;
    • Extract and move to your desired location;
    • Create shortcut (if you want) - I'm waiting till I figure out how to run it.
  2. followed by Zach's Sanguino extensions.
    • Download the zip;
    • Extract and move the Sanguino folder into the Arduino/hardware folder.
Before actually programming the boards, you also need to download the latest stable release of the firmware. This is located in the reprap-mendel-yyyymmdd.zip that is installed when installing the Reprap Host software. Guess that means a quick side track. Don't go away.

Step 6: Install Reprap Host Software
Following the instructions on the 'installing the Reprap Host software' wiki page, I did the following (bear in mind that I am starting with a relatively fresh XP installation on the machine I am using for this):
  1. Installed Java 6 from http://java.com/
  2. Installed the RepRap Host software from sourceforge (reprap-mendel-20100702.zip)
    • Quite easy really, unpack the zip to a suitable location and run the reprap.bat to run the software.
    • As I decided not to install in Program Files, I had to edit the batch file. The instructions don't mention this, even though they word it as if installing in Program Files is optional. (I might go edit the wiki if I can figure out how).
  3. Check out which other Useful Software Packages you need.
Note, there are alternate host applications, two keys ones appear to be the Skeinforge/ReplicatorG duo and RepSnapper. I will be trying these in the future to see which suits me best.

Ok, that means I now have the firmware needed to continue with setting up the electronics.

Step 7: Wiring wonders & woes
This forum post by rhmorrison refers to faulty soldering almost blowing his electronics, but more importantly, he describes that moving the stepper motors before powering the electronics will like up the corresponding LED (kind of like the electric motor light bulb generator we all made as kids).

Because of this I decided to do the inter board wiring before hooking up any power to the boards. There seems to be no one clear description and image of this all working. I referenced the following:
  1. Nudel's ground pin image. (Shows the stepper to main board connections).
  2. The Tech Zone Official Electronics Installation Page. (Shows the extruder controller to main board connections)
  3. The Tech Zone HowTo page.
For what it's worth my LED's all lit up when tested by moving the stepper back and forth.

TechZone - all wired up

For what's it worth, I will be changing the I2C wiring (one of the 2 wire connectors between the main board and extruder controller) to include a ground wire following Mdbaughman2's experiences.

Step 8: Getting connected
The Ho
wTo page says if you have 2 pins next to the serial connector you can put a jumper on them for the board to be powered from the USB connection. (In the recent versions of Techzone remix electronics sets sold from Ebay - May 2010).

On my board, there is what would appear to be two pins that have been permanently shorted/bridged, there are also no connectors for external power, so I figured the board is permanently configured to be USB powered (don't know what this means for using the SD card slot then). Anyway, I figured the best was to give it a go.

Having kept the Arduino Getting Started w/ Arduino on Windows page open since installing the software, I followed the steps on there. Basically the following:
  1. Plug in the USB connector to your PC;
  2. When prompted for drivers point to your Arduino/drivers folder (or check the FTDI site for newer ones);
  3. Open the Arduino application, and revert to the Microcontroller firmware installation instructions (see next step).
Step 9: Loading the firmware (eventually)
I could eventually continue following the steps under the Programming the Motherboard heading on the Microcontroller firmware installation page.

I followed these steps (any folder locations refer to sub-folders off Reprap\mendel\firmware\FiveD_GCode):
  1. Copied configuration.h.dist to configuration.h in the FiveD_GCode_Interpreter and Extruder folders
  2. Load the FiveD_GCode_Interpreter/FiveD_GCode_Interpreter.pde sketchbook
  3. Modified the configuration.h tab to match my setup (guessed most of it as I don't know what applies yet - it seems to be pretty much setup for the v3 electronics which the TechZone stuff is - For the hardware, I left it as standard for now, but will need to change when I figure out the steps, etc on the ScrapStrap) and saved.
  4. Selected the Tools->Board->Sanguino board and then Sketch->Verify/Compile
  5. My board was still connected to the PC from Step 8. (if your's isn't, reconnect now).
  6. Selected Upload to I/O Board and ... It fails!!
Binary sketch size: 22514 bytes (of a 63488 byte maximum)
avrdude: stk500_getsync(): not in sync: resp=0x00
avrdude: stk500_disable(): protocol error, expect=0x14, resp=0x51

More in Part 3...

Wednesday 7 July 2010

Plastic Phantastic

Just a quick note tonight. While trying to figure my way through the electronics I figured I needed to also get a move on with the extruder parts.

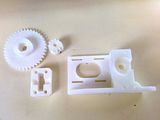
I decided to give in and do the sensible thing, so instead of trying to make an extruder manually I bought a set of RP parts for a Wade's extruder from NopHead of Hydraraptor fame. This is fitting as the heater portion will be based on his Plumbstruder design.

The parts arrived today and are fantastic. These are the first printed parts that i have seen and touched physically, and they definitely inspire me to continue on this quest. Having said that, progress is likely to slow over the next few weeks due to work commitments and holidays.
Wade's Extruder parts by Nophead

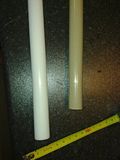
Here are some pictures of the bits and progress so far (more detailed descriptions will be included in a future post on the plumbstruder - you'll also see that I now have the proper stand-off's for my electronics):

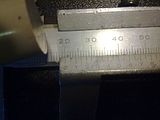
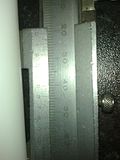
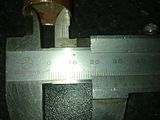
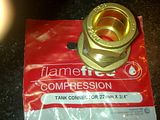
PTFE &amp; PEEKPEEK sizePTFE size22mm Copper IDTank fitting for collarElectronics with stand-offs

Saturday 3 July 2010

Shipshape Shed

As mentioned in the I'm Back!! article, time was spent finishing off Lorraine's Lair and creating Craig's Corner instead of working on the camper and other projects.

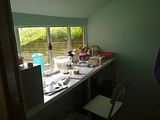
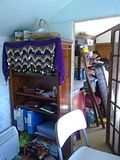
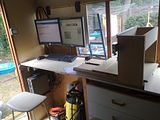
These two rooms are our hobby areas. The pictures should quickly give you an indication into our personalities, as Lorraine's area is nicely done up as opposed to mine being very DIY and functional

Here are a few more pictures to show you what it currently looks like.

Lorraine's Lair
Lorraine's Lair 1Lorraine's Lair 2

Craig's Corner
Craig's Corner 1Craig's Corner 2

The PC screens fold up to the ceiling to give more space if not computer activities are taking place.

Tech Zone Techniques - Part 1

Having completed the ScrapStrap hardware, I figured it was time to dig out the Tech Zone Remix electronics that I bought (I bought directly from Kimberly at Tech Zone, but you can now buy them from BotMill)

There is a HowTo page on the wiki which I hope to help update, but thought I should keep a record of what I do, as I do it so that I can be sure what works and doesn't. Hence this page. I will be including pictures as I go. This page does not intend to replace the HowTo page or other resources, but should rather be seen as a record of the steps I followed.

Step 1: Mounting plate
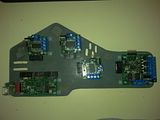
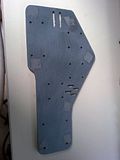
Choose and make a mounting plate. As per the HowTo page, these electronics are so much smaller that they don't need to use that original thick sheet. Choosing and making the plate at this point means that you can make the wire lengths to suit.

I chose to go with Azdle's Mounting Plate for Tech Zone Remix Electronics, although in my case it was manually made using my bandsaw and drill press. I installed Inkscape in order to be able to print the svg file out to scale.

The material was a piece of ABS plastic which had formed part of the cover of a plan printer which I stripped recently. I kept the plastic covers in case I could recycle the ABS at some time in the future.

Reprap thick sheet

Step 2: Unpack and mount
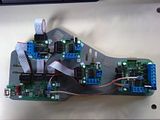
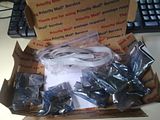
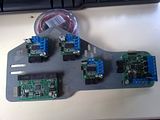
Unpack the the electronics (be careful of static). The first picture was taken removing the bubble wrap, but while still in the anti-static bags. Mount all the pcbs on your mounting plate. (I don't have enough stand-off's so will only complete assembly when I have bought some more. I mocked it up in the meantime)

Tech Zone Remix electronicsTech Zone Remix electronics mounted

Step 3: Ground points
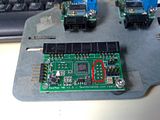
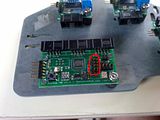
Mark the ground pins on all the connectors (see this image). At this point a slight diversion happened as I noted that one of the 10 pin connectors was not in place on the main board. I emailed Tech Zone, but as I didn't feel like waiting to find out if there was a reason for it to be missing I went ahead and fitted one (before and after pics below). I salvaged the connector off an old PC motherboard I had lying around for just such a reason. When de-soldering these I find the best strategy is to remove the plastic bit first and then de-solder one pin at a time. The connector can be reassembled again afterwards.

Tech Zone mainboard without connectorPhotobucket

Step 4: USB/TTL Board to Mainboard connection
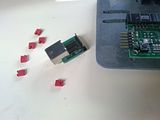
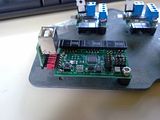
Here I followed the lead of those who had gone before and decided to use The Jumper Technique. Instead of creating a cable for linking the USB board, simply use 6 jumpers. This needs the jumpers that have holes right through. I scrounges some of the old motherboards and bits that I have lying around. I'll probably change this to a wired connector in the future once I can print a USB mounting block in order to ensure a firm mounting.

USB jumpers beforeUSB jumpers after

Step 5: Upload Firmware
According to the HowTo page, the boards come with the Makerbot firmware installed. This means that a boot-loader doesn't have to be installed, but the firmware must be updated. This is a new area for me. I am a software developer by trade, but for Windows, not embedded so haven't had to do this before. I'll be continuing with a detailed breakdown in Part 2